Compass declination: set it, then prove it before the trail.
A correct bearing can still send you the wrong way when the compass and map use different north references. Find the current angle for the trip location, set it once, and catch a reversed adjustment on a known line while the car is still nearby.
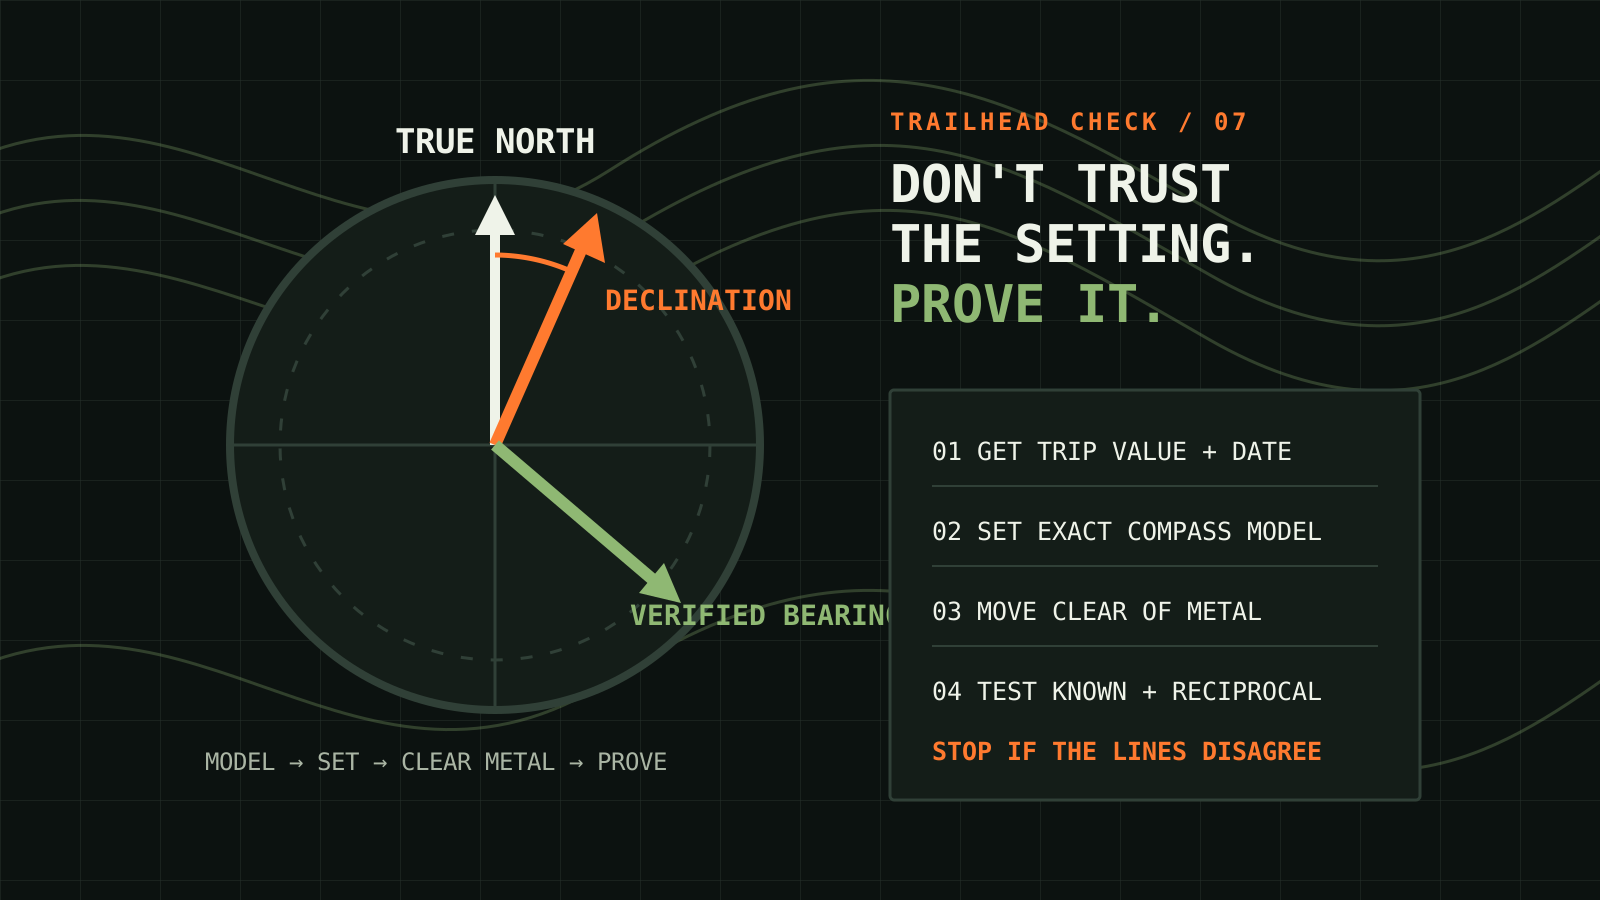
The small angle that creates a large miss
A magnetic compass points along the local magnetic field. A topographic map is laid out around true or grid north. The horizontal angle between true north and magnetic north is magnetic declination. NOAA notes that this angle changes with both location and time, which is why the date printed beside a map's declination diagram matters.
The World Magnetic Model 2025 is the current U.S.–U.K. reference model. NOAA says the model is produced in five-year intervals, the current version expires at the end of 2029, and its calculator accepts a point, altitude and date. The model is a source for the angle; it does not replace the map, the compass instructions or a field check.
A direction error grows with distance. On a straight one-mile leg, a five-degree angular error is roughly 460 feet of cross-track offset; ten degrees is about 930 feet. Terrain, detours and imperfect pacing make real travel less tidy, but the geometry explains why “close enough” at the trailhead can become the wrong drainage later.
First identify the north reference
| Reference | What it means | Where to look |
|---|---|---|
| True north | Direction toward the geographic North Pole. | Map true-north line or neat line; NOAA declination output uses true and magnetic north. |
| Magnetic north | Direction the free needle seeks at that place and time. | Compass needle, away from local magnetic interference. |
| Grid north | North direction of the map's coordinate grid. | Map legend or collar. Grid north can differ from true north. |
Read the legend for the exact map in hand. Do not assume every vertical grid line is true north or that every phone app labels bearings the same way. Write the reference beside every planned bearing: for example, “247° true.” That one word prevents a partner from treating a true bearing as magnetic.
Get a current value for the trip, not for home
- Choose a representative latitude and longitude inside the route, not your current location hundreds of miles away.
- Enter the trip date in NOAA's magnetic-field calculator and select the World Magnetic Model output.
- Record the declination number, whether it is east or west, the date and the point used. A signed result must keep its sign.
- Compare it with the map-collar diagram. A difference may reflect the map's age, a different reference point, or confusion between true and grid north. Resolve the reason before travel.
- If the route covers a broad region or lies where values change rapidly, calculate more than one point and decide whether a single setting is appropriate.
NOAA's model includes uncertainty and limitations. Local crustal magnetism, a geomagnetic disturbance and nearby metal can affect an observation. Near the model's polar blackout zones, NOAA states that the Earth's field can be unusable for direction. Most hikers are far from those zones, but no model turns a disturbed needle into a trustworthy bearing.
Set the compass without trusting a rhyme
Adjustable-declination compasses move the orienting arrow relative to the bezel. The direction of the adjustment and the markings vary by design. Follow the manual for the exact model, use the supplied tool if one is required, and confirm that the setting cannot move loosely. Record it on the route card as both a number and direction, such as “12° east, set for October 22, 2026.”
If the compass has no adjustable declination, keep the correction on the map margin and state whether each written bearing is true or magnetic. USGS gives a specific map-orientation method: align the baseplate with the map's north–south neat line, set or apply local declination, then rotate the map and compass together until the magnetic needle overlays the orienting arrow. Its instructions also warn to work away from metal such as rebar.
A remembered “add east” or “subtract west” rule can fail when a person reverses the conversion direction or uses a differently marked compass. The safer system is model-specific instructions followed by an independent check.
Run the known-line field check
Use a straight feature whose direction is clear on the current map and visible on the ground: a long road segment, straight trail approach, shoreline or two well-separated landmarks. Avoid a line so short that sighting error overwhelms the result.
- Plot or read the feature's true bearing on the map and write it down.
- Set the current declination according to the compass instructions.
- Move away from the vehicle, steel tables, fences, power equipment and reinforced concrete. Put phones, magnetic clasps and speakers away from the compass.
- Face along the known feature and take a careful bearing. Repeat it after stepping several yards to a second spot.
- Compare the observed direction with the map bearing. A small difference can come from sighting and map precision; a large or opposite difference means stop and troubleshoot.
- Turn around and test the reciprocal direction. It should differ by 180 degrees. This catches a surprising number of backward-direction mistakes.
The goal is not laboratory calibration. It is to discover a reversed east–west setting, a 180-degree error, a stuck needle, a mislabeled bearing or a magnetic object before committing to terrain.
Troubleshoot the mismatch in a fixed order
| What you see | Likely issue | Next check |
|---|---|---|
| Needle changes when you shift position | Nearby metal, magnet, electronics or electrical current. | Move well clear, separate equipment and repeat from two places. |
| Error is about twice the local declination | East/west direction or conversion may be reversed. | Reset from the model instructions and verify on the known line. |
| Bearing is close to 180° wrong | Direction-of-travel arrow or reciprocal was reversed. | Check which end of the baseplate points toward the destination. |
| Map and distant terrain still disagree | Wrong feature, wrong position, old map, or true/grid mismatch. | Return to the known point; compare legend, coordinates and landmarks. |
| Needle drags, bubbles or will not settle | Compass damage or operating-limit problem. | Do not rely on it; replace or have it evaluated before the trip. |
Make two people prove the route independently
For a group trip, give the map and declination source to two people. Each person should set a compass and calculate the same test bearing without watching the other. Compare the result, then walk a short, safe leg with a catching feature such as a road or trail that cannot be missed. If the results disagree, the drill succeeded by finding the disagreement in a controlled place.
Next, have one person create a route card while the other checks three items: bearing reference, current declination and reciprocal. Pair the card with the two-way radio route test so a missed contact has a written action instead of an improvised search.
Use bearings with handrails and catching features
A compass bearing is stronger when terrain constrains the consequence of error. A ridge, stream, trail or shoreline can act as a handrail. A road, broad river or unmistakable slope beyond the target can act as a catching feature. An attack point—a distinct nearby feature—shortens the final precision leg.
Do not plan a long blind bearing through cliffs, fast water, avalanche terrain, wildfire closures or other objective hazards. Navigation practice does not override land-manager instructions, legal closures, weather warnings or the need to turn around.
Separate phone heading from a physical compass check
NOAA explains that electronic compasses and the World Magnetic Model commonly coexist in GPS receivers and phones. That is useful, but it is not an independent check when both devices share the same wrong map setting or reference. A phone can also be affected by magnetic accessories and may require a sensor calibration.
Use the phone to confirm coordinates and download maps before leaving service, then test the physical compass and paper map as their own system. Keep power, weather protection and the planned no-signal method separate. Redundancy means each method has been practiced, not merely packed.
Build a declination field card
- Trip point: latitude and longitude used for the model.
- Value: degrees east or west, with the sign preserved.
- Date and model: trip date and WMM2025.
- Map reference: true north or grid north.
- Compass setting: model-specific adjustment completed and secured.
- Known-line result: expected bearing, two observed bearings and test location.
- Reciprocal: original bearing plus or minus 180 degrees.
- Interference check: vehicle, metal, phone and magnetic closures moved away.
- Catching feature: the unmistakable feature beyond the destination.
Keep the card with the map. Recalculate for a distant trip, a new date or a replacement map. Recheck the physical setting after travel because an adjustment screw or bezel can move in storage.
Questions readers ask
Should I use the declination printed on an old map?
Use it as context, then obtain a value for the trip location and date from NOAA's current model. The map diagram tells you what the cartographer used and may also show grid convergence, but magnetic declination changes with time.
Does a phone compass make declination irrelevant?
No. A phone may apply a model automatically, but its magnetic sensor can still be disturbed and power or positioning can fail. A practiced physical compass and suitable paper map provide a separate method.
How do I know whether east or west was set correctly?
Follow the instructions for the exact compass, label the value and direction, then verify it against a known map line or distant landmark. The field result is the decisive check.
Sources checked
- NOAA National Centers for Environmental Information: World Magnetic Model, including the WMM2025 specifications, calculator guidance and model limits.
- NOAA NCEI: World Magnetic Model 2025 Released, published December 17, 2024.
- U.S. Geological Survey: How To Get Your Map and Compass To Face the Same Direction.
- National Park Service: Get the Right Angle, updated April 11, 2025.
Reviewed October 22, 2026. Model outputs, maps, closures and land-manager instructions can change; verify them for the actual route and date.